01 Sep How to create a Facebook page
Creating a Facebook Page is important for people to discover and interact with your content / business online. Find out how to set up your Facebook page.
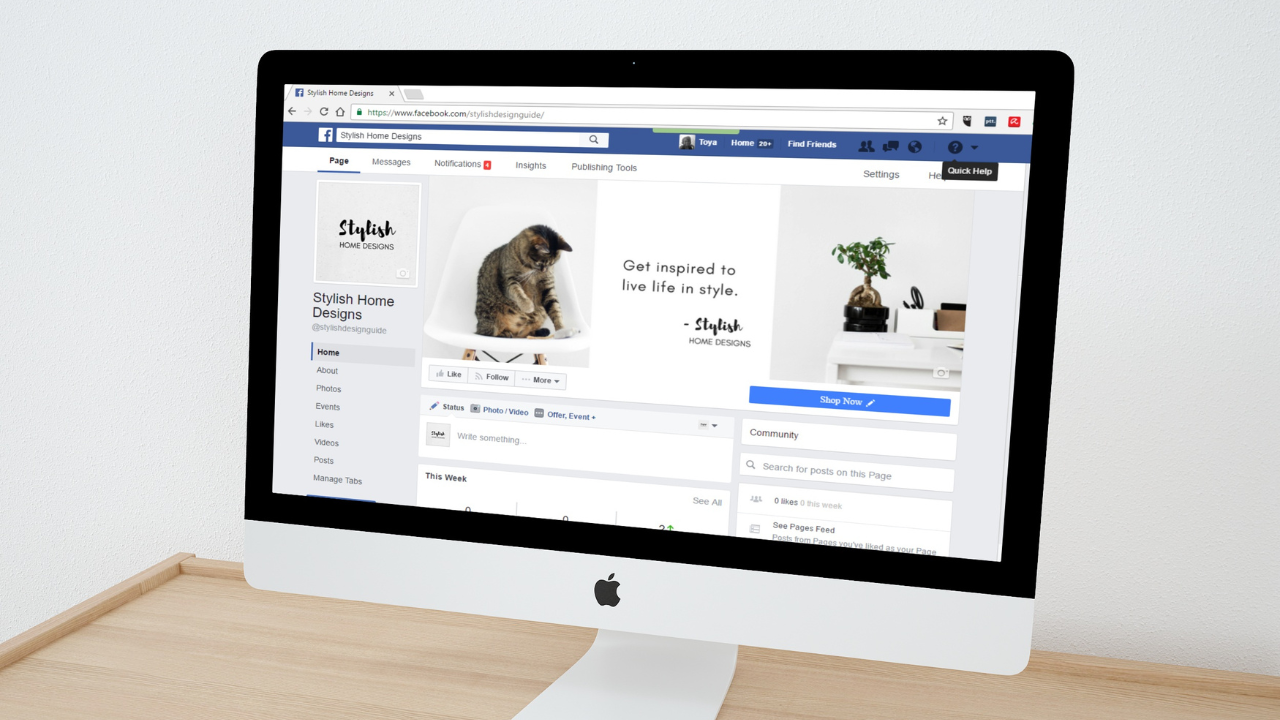
Facebook is an American online social network that is part of Meta Platforms. Facebook was founded in 2004, and became the largest social network in the world, with nearly three billion users as of 2021, and about half that number were using Facebook every day. Making it the most important social media marketing platform for every brands, organizations, artists, content creators and public figures to have their presence there. So Facebook is simply not a social network you can ignore.
How to create a Facebook page for business?
Before you can sign up for your Facebook Business Page, you need to log into your personal Facebook account. then dive into the Page creation steps.
Step 1 : Create your Facebook page
Go to : https://www.facebook.com/pages/create
Enter your business information in the panel on the left. As you do so, the page preview will update in real-time on the right.
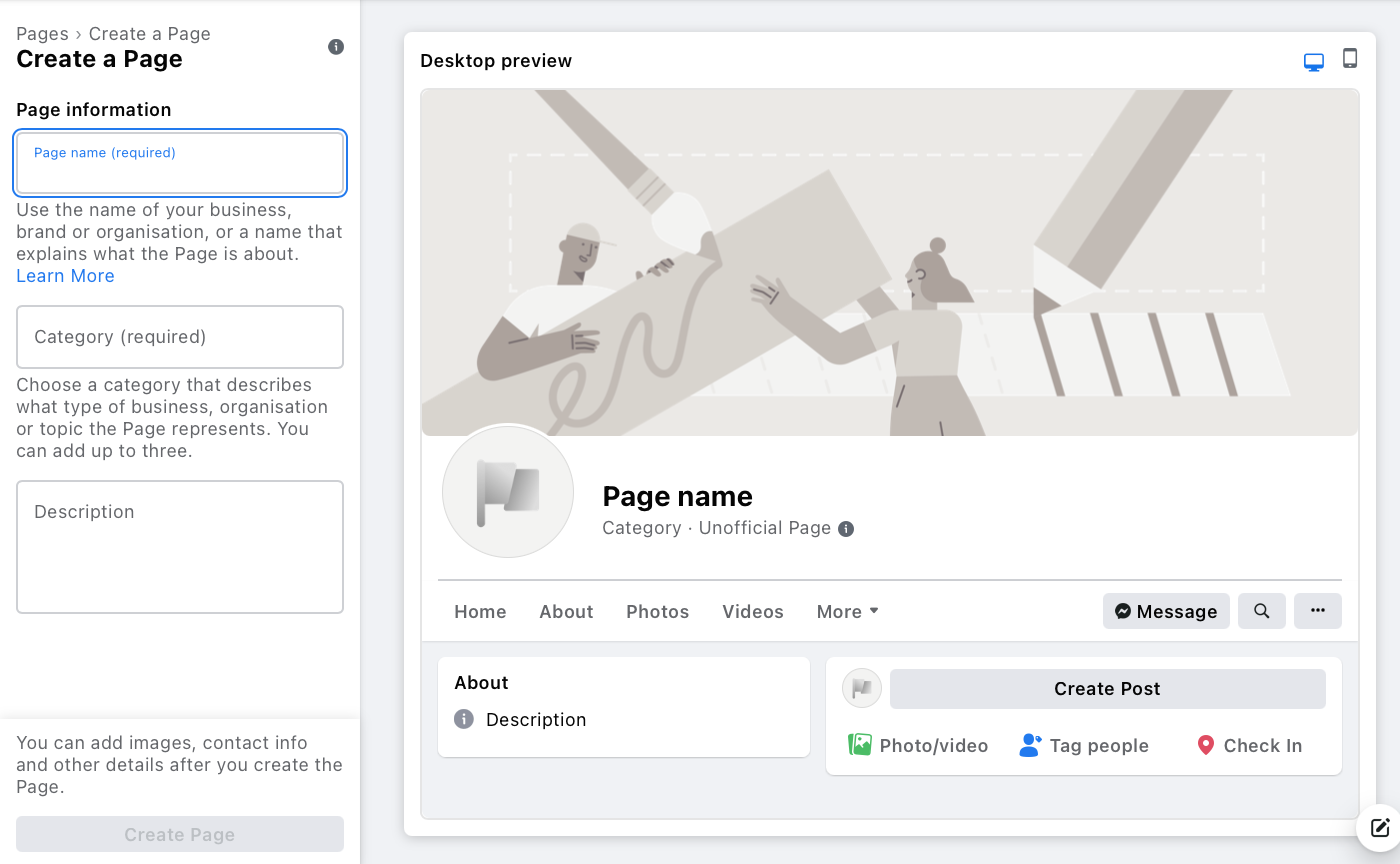
For your page name, use your business name or the name people are likely to search for when trying to find your business.
For category, type a word or two that describes your business and Facebook will suggest some options. You can choose up to three of the suggestions.
Then, fill in the Description field. This is a short description that appears in search results. It should be just a couple of sentences (maximum 255 characters).
When you’re happy with your page information, click Create Page.
Step 2 : Add images to your Facebook page
Next, you’ll upload a profile and cover images for your Facebook Page. It’s important to create a good first impression. Make sure the photos you choose to align with your brand and are easily identifiable with your business.
Upload your profile photo first. This image accompanies your business name in search results and when you interact with users. It also appears on the top left of your Facebook Page.
If you have a recognizable brand, using your logo is probably the best way to go. If you’re a celebrity or public figure, a picture of your face will work like a charm. And if you’re a local business, try a well-shot image of your signature offering. The important thing is to help a potential audience, follower or
customer to recognize your page immediately.
According to Facebook :
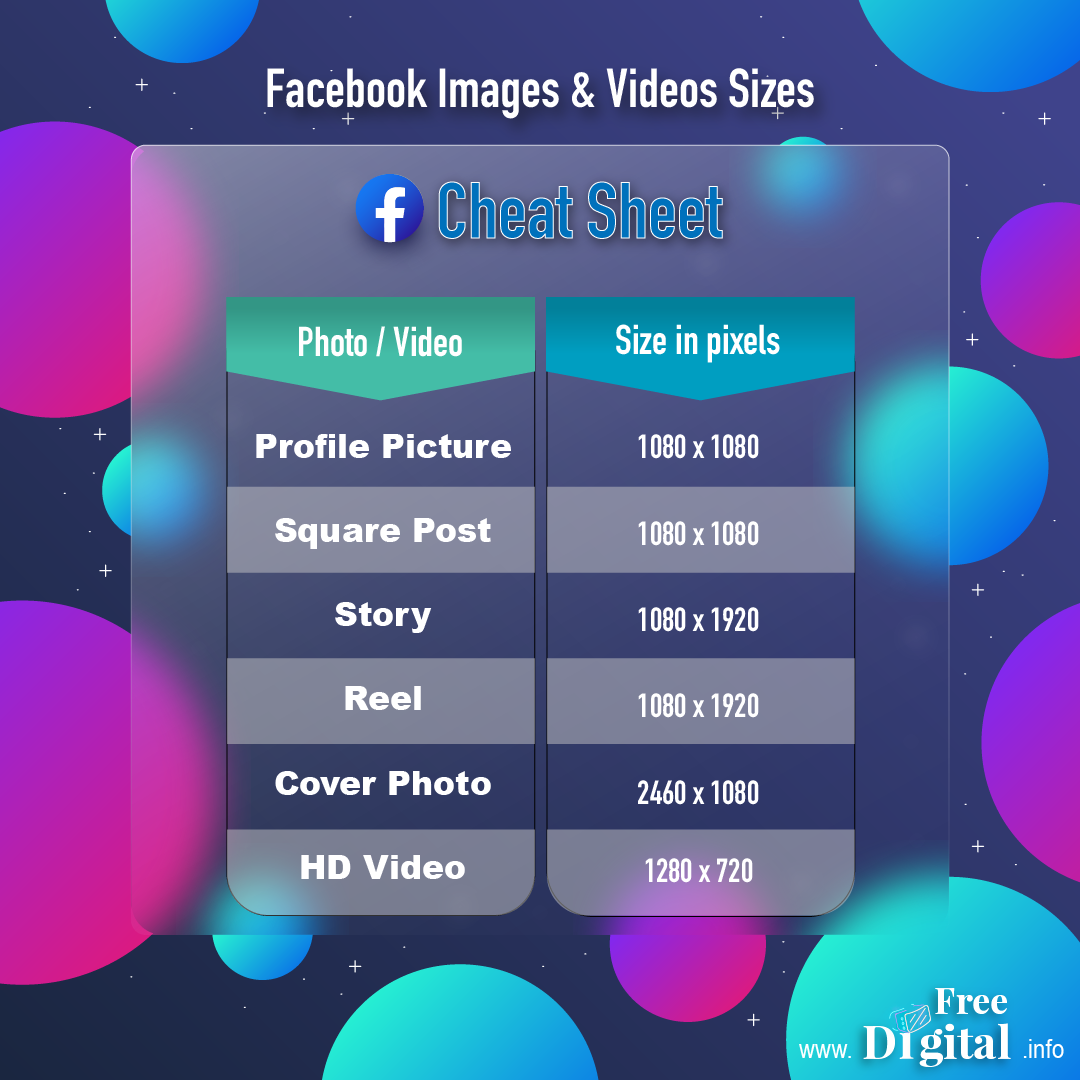
Profile Picture Displays at 170×170 pixels on your Page on computers, 128×128 pixels on smartphones and 36×36 pixels on most feature phones.
But what we’ve found after managing a lot of Facebook pages is that high-quality square pictures look perfect, especially with 1080×1080 pixels.
Check this Facebook images and videos sizes cheat sheet :
For more detailed information about Facebook sizes check Social media images sizes.
You may get a better result by using a PNG file for your profile and cover photos with your logo or text.
Once you’ve chosen a great photo, click Add Profile Picture.
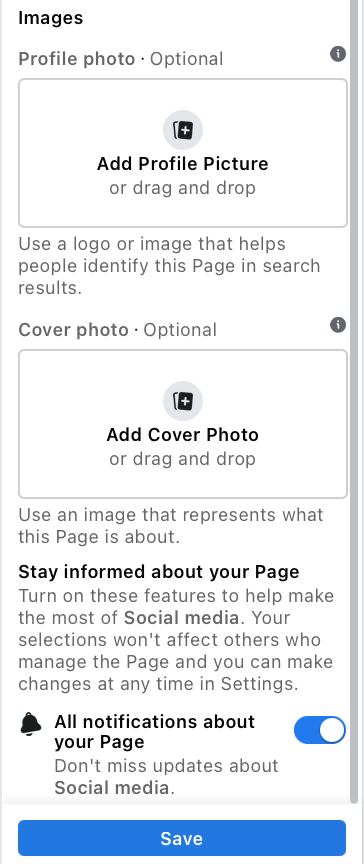
Now it’s time to choose your Facebook cover image, the most prominent image on your Page.
This image should capture the essence of your business and convey your business or brand personality. Facebook recommends you choose an image that’s 1640 x 856 pixels.
Once you’ve selected an appropriate image, click Add Cover Photo.
After you upload the photos, you can use the buttons in the top right of the preview to toggle between desktop and mobile views. Use these to make sure you’re happy with how your images look in both displays. You can drag the images in the left column to adjust their positioning.

When you’re happy with your selections, click Save.
There you are! Now you have a Facebook Page. However, you’ve still got a lot of work to do before you share it with your audience.
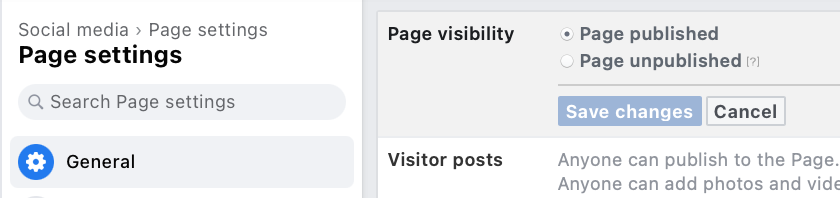
If at any time you want to take your Facebook Business Page offline while you work on the details, you can choose to unpublish your page. From the Manage Page menu, click Settings, then General. Click Page Visibility and change the status to Page unpublished.
Follow the same steps to republish your page when you’re ready.
Step 3 : Create a Facebook page username
Your username, also called your vanity URL, it’s how people could find you on Facebook.
Your username can be up to 50 characters long, but don’t use extra characters just because you can. You want it to be easy to type and easy to remember. Your business name or some obvious variation of it is great.
To create your username, click Create Username on the Page preview.
Enter the name you want to use. Facebook will let you know if it’s available. If you get a green checkmark, you’re good to go. Click Create Username.
Step 4 : Add your Facebook page's details
While you might be tempted to leave the details for later, it’s important to fill out all of the fields in your Facebook Page’s About section right from the start.
As Facebook is often the very first place a customer goes to get information about you, having it all there is important. For example, if someone is looking for a business that’s open till 9, they want to confirm this information on your Page. If they can’t find it, they’ll surely keep looking until they find another place that’s more forthcoming.
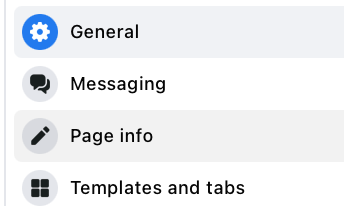
Fortunately, Facebook makes this very easy to complete. From the Manage Page menu, click Settings, General then choose Edit Page Info.
Fill in the appropriate details here, starting with your website.
If your business is open to the public during specific hours, make sure to enter those here. This information appears in search results.
Don’t forget to complete the Add an action button section.
Facebook’s built-in call-to-action button makes it very easy to give the consumer what they’re looking for and it allows them to engage with your business in real-time.
The right CTA button will encourage visitors to learn more about your business, shop, download your app, or book an appointment.
To add your CTA, click the blue box that says Add Button, then choose which kind of button you want.
Step 5 : Create your first Facebook post
Before you start inviting people to follow and like your Facebook Page or even publish it in some cases, you should post some valuable content. You can create your own posts, or share relevant content from thought leaders in your industry.
For your very first post you could:
Write a welcome post: IF you want to convince your audience to like and follow you. Create a welcome post that includes details about your business and why people should like your Page.
Provide information: You could let your potential audience know about what you’ll share, such as special offers, updates about your business and more.
Share meaningful content: Anyone who comes to your Page will see your posts. Make sure you post content that resonates with people and makes them want to follow your business.
Draw engagement: Post something that will draw interaction from your audience. You could add a catchy visual or reference a group, event or story that you posted.
Pin your best or the most important post: Is there important information you want all visitors to your Page to see? A promotion you don’t want them to miss? A top-performing piece of content you want to show off? Put it in a pinned post.
A pinned post sits at the top of your Facebook Business Page, just under your cover image. It’s a great place to put an attention-grabbing item that will draw your visitors in and make them want to stick around.
The pinned post remains at the top of your Page until you change or remove it.
To pin a post you like Click the three dots on the top right of the post, then click Pin to Top of Page.

Make sure that whatever you post is adding value for your visitors when they arrive at your Facebook Business Page, so they’ll be inclined to stick around.
Now you are ready to publish your page to the world and you can start inviting people.
Step 6 : Invite People to follow your Facebook page
Your Facebook Page is now your online presence that will make potential customers and fans feel comfortable interacting with you.
Now you need to get some followers!
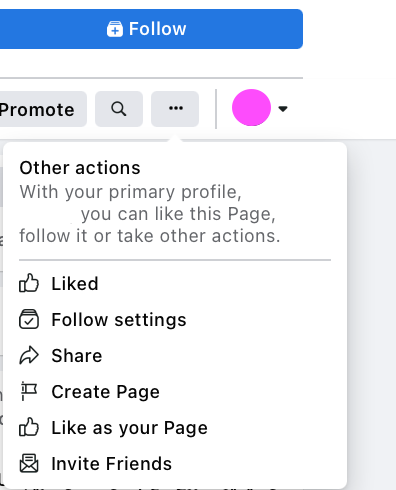
Start by inviting your existing Facebook friends to like your Page. To do so, click on the three dots below your page’s cover photo, then choose to Invite friends.
Select which friends you want to invite, then click Send Invites.
Use your other channels, like your website and Twitter, to promote your new page. Add “follow us” logos on your promotional materials and email signature. If you’re comfortable doing so, you can ask your customers to review you on Facebook, too.
Pingback:UPDATED - Social Media Images & Videos Sizes For All Networks
Posted at 00:15h, 07 November[…] Starting to use Facebook for business ? Check how to create a professional Facebook page. […]